Главная страница Случайная страница
КАТЕГОРИИ:
АвтомобилиАстрономияБиологияГеографияДом и садДругие языкиДругоеИнформатикаИсторияКультураЛитератураЛогикаМатематикаМедицинаМеталлургияМеханикаОбразованиеОхрана трудаПедагогикаПолитикаПравоПсихологияРелигияРиторикаСоциологияСпортСтроительствоТехнологияТуризмФизикаФилософияФинансыХимияЧерчениеЭкологияЭкономикаЭлектроника
Sculpting in ZBrush
|
|

Back in Zbrush we press t to deactivate 3D edit mode and then press Layer: Clear to clear the canvas. Leaving 3D edit mode is needed because if we try to import an external model while a model is already active, ZBrush will try to import the external model 'over top of' the selected one, and in this case it won't work because their vertices don't correspond. Clearing the canvas simply gets rid of the image of the model that printed to the canvas when we left 3D edit mode.
Now we are ready to import our new mesh. Go to Tool: Import and import the file, and then with that model selected, drag on the canvas to put a copy of it on the canvas. Press t to go back to 3D edit mode and we are ready to sculpt. We can also press Shift+f to show the wireframe on top of the mesh.

At this point there are no secrets or special tools that I use to work with the model, I mostly use the Standard, Smooth, and Move brushes.
Before starting to sculpt we will divide the model one time, by pressing Ctrl+d.
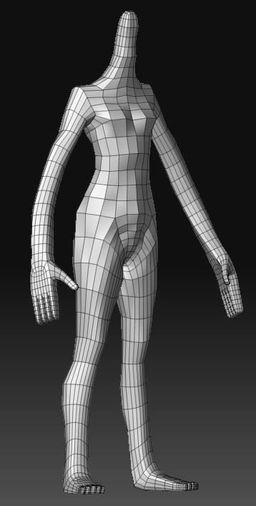
and we will now start the sculpting session. We will start shaping out the legs and the overall body using the Standard brush and the Move brush, paying special attention to raising the shoulders and starting on the proportions and shapes.

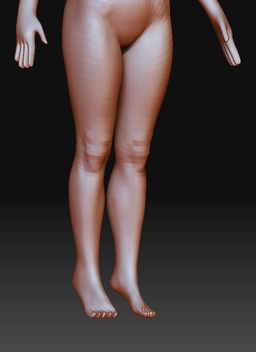
At this early stage I have decided to close the legs of the character a bit more, we will use transpose for this, in this way we will see what a great tool is this to reshape and adjust your models without having to leave ZBrush. Press r to go to rotate mode and then press Ctrl and click and drag on one of the legs; this selects (creates a mask for) the points in the leg, that will enable us to pose it. At this point we make sure to have X symmetry activated, in case we don't, we will press x on the keyboard to activate it.
At this point we see that the legs are selected but the mask is too blurry. So unselect them (remove the mask) by holding Ctrl and clicking and dragging on an empty area on the canvas. Then, set Preferences: Transpose: Blur Strength to 2, and again select the legs.

We click on the pelvis and drag until we reach the foot of the character, and a line will be created, this is the transpose line that we will use to close the legs. Click in the middle of the last circle in this line and move it to the center, and the legs will move closer together.

We can press q to go back to Draw mode and then deselect the legs (remove the mask), and we should have something like this now:
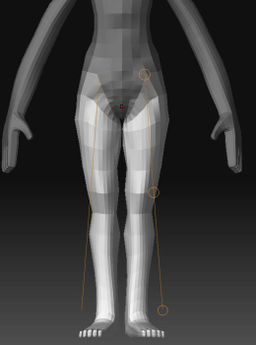
At this stage I have decided that the model will be wearing some shoes with high heels, so using the same technique as before, we will select the feet and using transpose we will rotate them and scale them down a little bit. After that we can go back to draw mode and hold Template: Ctrl to go activate the smooth brush, and smooth the hands and feet out a bit.

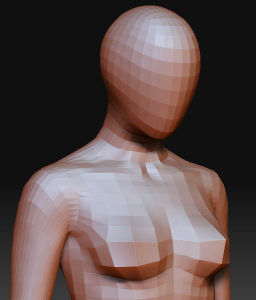
Time to start giving shape to the head, and the torso, at this point it should start to be obvious that the model is a girl, not a guy.


Now we can divide the model one more time to keep refining it; press Ctrl+d again. Keep using the Standard and Smooth brushes to give shape and sculpt the body.
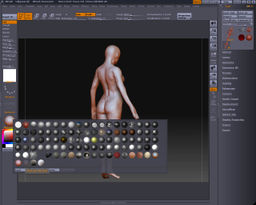
As you can see on the screenshots, we are not using the preview renderer but the fast renderer, we will go now to activate Render: Preview and then change the material to better see the model.

Once we're happy with this level of detail, we subdivide again and keep sculpting. I'm not doing anything fancy, just using Standard, Smooth, and Move brushes. This is why ZBrush is so much fun, the process is straightforward and really feels artistic and like drawing. At this time we start shaping subtleties such as collar bones, the rib cage blending into the belly, hip bones, and so on.

We keep sculpting the mesh, start defining the node and eye sockets area, and give more detail to the sternum, clavicle and shoulders area.

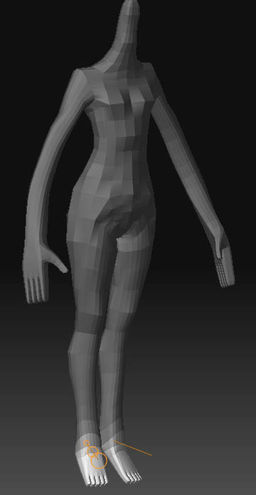
Here is what the model looks like at this point:
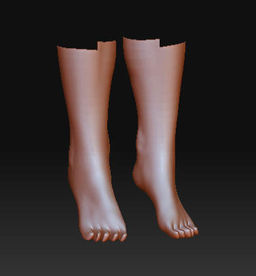
We are going to start shaping the feet at this point, we will hold Ctrl-Shift and drag a rectangle across the feet, this will hide everything but the feet.

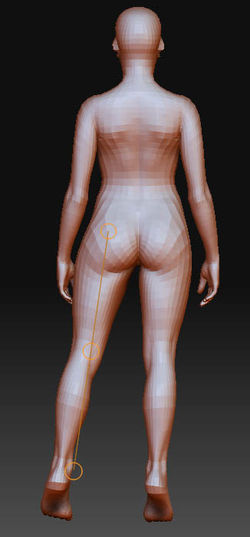
Going back to the overall model, we are ready to divide one more time and keep adding and refining the shape of the girl, notice the detail of the back and also how we start having some nice detail going on on the belly, ribs and breast area.

And we keep shaping things out, working on the overall shape of the arms now and still refining some areas, like the hips, and the belly button area.
[edit]
Sculpting II (The Face)
Ok at this time i think is a good idea if we start getting some detail on the face, so we will go back one level of division by pressing Shift+d.
Earlier we started shaping the eyes and nose a bit, but I didn¥ t really like where that was going so using the Smooth tool I smoothed out all of that and we are going to start now again with the face!:)

We will hide the rest of the body and keep working on the face now, and by using the usual brushes we will start shaping the face.

The head and specially the face is a very difficult and delicate area, plus being a woman makes it even more difficult so we have to pay special attention not to make it too like a male...
At this point we can go up one level of division and keep working on it, as shown on the image.
Now we are going to divide the model one more time, to get some more definition on the face. To do it, we will need to unhide all the model first by holding Ctrl-Shift and clicking on an empty area on the canvas. Then press Ctrl+d to subdivide the model, and hide the rest of the model again. We can hide everything but the face by activating the new lasso tool and then holding Ctrl-Shift and dragging a lasso around the face.

Keep modeling the face, still using the same few brushes...notice again that even at this stage you don¥ t need a lot of tools to create this model!
We will add some detail on the lips, trying to give some feeling of flesh around them, and we can give shape to the eyebrows and to the sockets of the eyes and also the nose


We will start giving shape to the eyelids. This is a very delicate area so you have to be careful here. You can see the evolution of the section in these two pictures


After this we will start reshaping the ears, still with just the standard and smooth brushes.

Here we have worked on the overall model a bit further, refining areas, giving some small details (like behind the knees...) and working on the hand in the very same way that we did with the rest of the body.
[edit]
Posing

The next step now is going be the posing of the character, and adding some props. First save the file just in case we don't like the pose that we get, we will be able to go back to the original version of the model...
For the posing we are going to use transpose one more time, and in the same way that we did to adjust the model at the beginning, the trick here relies in finding an interesting pose/shape.
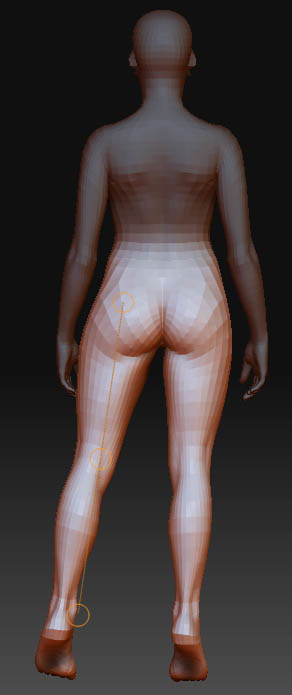
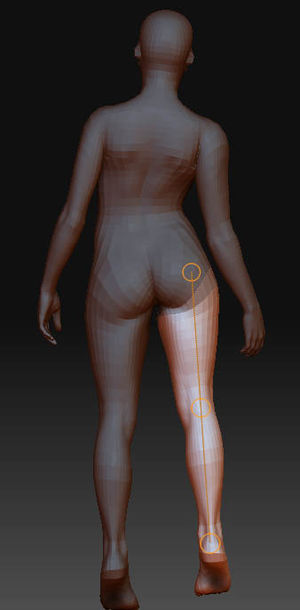
At this point we have a model with 7 levels of division and we have nearly reached the 3 and a half million polygons. We will move down to the 3rd level of division to pose the model, in this way we will work with less polygons and anyway all of the details will be updated to the new pose once we move back up to the higher levels of subdivision. If X symmetry is still active, press x on to deactivate it since we won¥ t pose the model in a symmetrical way. Then press r to go to rotate mode, and holding and Ctrl- drag on the leg to apply a selection mask.

Click and drag on the leg to draw the transpose line, from the hip to the foot, and then rotate the leg by clicking on the middle of the bottom circle and dragging, until we have something similar to this:
| 
| 
| ||
| 
|
{{{6}}}
| ||

|  {{{4}}}
|
And we keep posing as shown in the next set of images:

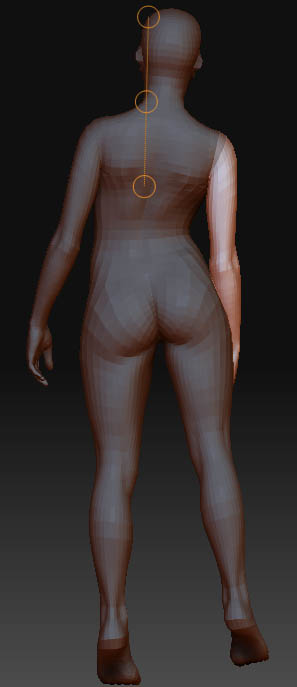
Rotate the head in a similar manner; apply a select mask, create a transpose line, and use that to rotate the head.


The rest of the model is posed in much the same way
Once we have the final pose of the model, we will have to refine some areas were skin is now folding, wrinkles are appearing and some bone structure is pushing the skin in ways that didn¥ t happen before. Notice in these two images the main differences; the first one is the model before posing, the second is the model after being posed. There's some skin folding around the ribcage, and also distortion in the shoulders and some other areas. A little bit of brushing takes care of those problems.
[edit]