Главная страница Случайная страница
КАТЕГОРИИ:
АвтомобилиАстрономияБиологияГеографияДом и садДругие языкиДругоеИнформатикаИсторияКультураЛитератураЛогикаМатематикаМедицинаМеталлургияМеханикаОбразованиеОхрана трудаПедагогикаПолитикаПравоПсихологияРелигияРиторикаСоциологияСпортСтроительствоТехнологияТуризмФизикаФилософияФинансыХимияЧерчениеЭкологияЭкономикаЭлектроника
Texturing
|
|
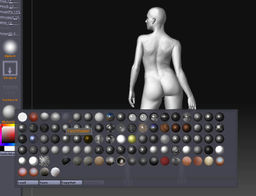
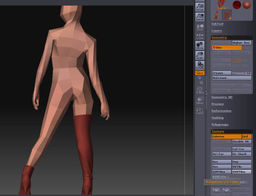
At this point we have finished the model, and we are ready to paint the texture of the girl. We'll be using the capabilities of Zbrush to paint directly on the polygons. In the Template: Tool: Subtool menu, make sure the girl mesh is active. Then, in the Material Fast shader material, in this way we will see the girl all in white.

Activate the polypainting by clicking on Tool: Texture: Enable UV, and press Tool: Texture: Colorize. Then select a skin color from then color picker on the left, and press Color: Fill Object to apply that color to the model.

To start painting some color and pores on the skin, we will use the standard brush, making sure that the ZAdd button is deactivated and that the RGB button is active, setting an Intensity of about 15 for the brush.
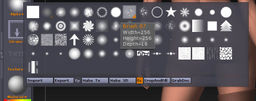
Next we will use an alpha brush.
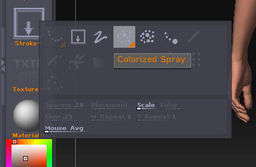
and instead of the DragRect stroke we will use the Colorized Spray stroke.
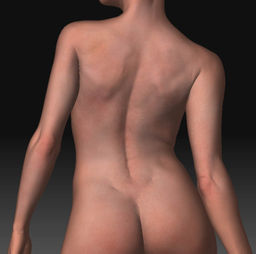
With just those settings and using different colors for skin tones, we'll paint the entire model until we get something similar to what is shown:

We are ready to export our model, colur and displacement map to 3dsmax. We'll first export the color map, so go to the lowest level of division to create some UV maps for the mode, by pressing Shift+d until until reaching the first subdivision level of the model, then press Tool: Texture: AUVTiles. This will generate a proper set of UV¥ s in order to create our other maps. Now we can create the color map by clicking on Tool: Texture: Color to Texture

Once we have created the texture, it will be automatically selected by Zbrush. Now we go to Texture: Flip V to flip the texture in the V direction since we will have to do it later on, otherwise.

and then in the same dialog we click on Export and we save the texture map as a TIF file
[edit]